Showing posts with label breakfast. Show all posts

Thursday, January 22, 2015

Cinnamon Roll Biscuits


I've been wanting to make cinnamon rolls for several months now.  Not sure why I got such a random urge -- probably that it seemed like a fun, festive treat for the holidays.  However, the problem with the holidays is that there already seems to be enough sweet stuff that I never really found a good time to make them.  Also, as delicious as they are, they seemed like a lot of work (even the overnight ones we love that require yeast).

So finally last weekend, I looked up the idea of cinnamon roll biscuits.  I think I had seen a recipe several years ago and the idea stuck with me.  And what do you know, Cook's Illustrated had come up with a version! It has no yeast and is super easy and fast to make. I just got up one morning, found a recipe, and got to work. My guess is that it took about 20 minutes for everything to come together and then 20 minutes to bake the biscuits.  In 40 minutes, we had a wonderful cinnamon roll breakfast!

The texture of the dough isn't the same as yeast-based cinnamon rolls -- it creates more of a flaky biscuit than a smooth dough.  But the flaky biscuit texture was delicious and the flavor was exactly right.  Also, I love that it created the same soft, cinnamon-sugar center just like the traditional roll. (Isn't that the best part?) 

Actually, looking at these pictures makes me want them again. And with them being so easy to make, we could easily have them again sometime soon!

Cinnamon Roll Biscuits
Taken from: Cook's Illustrated via Brown Eyed Baker
Makes 8-9 biscuits -- serves about 4

For the Biscuits:
  • 2 cups all-purpose flour
  • 2 teaspoons granulated sugar (I think next time I will increase this to 1-2 tablespoons)
  • 2 teaspoons baking powder
  • ½ teaspoon salt
  • 1¼ cups heavy cream (I ran out of heavy cream so I probably did 3/4 cup cream and 1/2 cup whole milk)
For the Filling:
  • 1 tablespoon unsalted butter, melted
  • 2 tablespoons dark brown sugar
  • 2 teaspoons ground cinnamon
For the Icing (we don't like much icing so I drastically reduced this)
  • ½ cup powdered sugar (I used 1/8 cup instead)
  • 1 tablespoon whole milk or cream
  • Optional: 1 teaspoon vanilla
  • Optional: 1/4 teaspoon cinnamon
1. Preheat oven to 425 degrees F. Place the oven rack in the upper third of the oven.
2. In a medium bowl, whisk together the flour, sugar, baking powder and salt. Add the cream and stir with a wooden spoon until a rough dough comes together. Remove the dough from the bowl and place on a lightly-floured surface. Knead the dough for about 30 seconds, or until smooth. If the dough seems dry, add more cream 1 tablespoon at a time.
3. Roll the dough into a 9x12-inch rectangle. Brush the dough with the melted butter. Stir together the brown sugar and cinnamon in a small bowl, then sprinkle evenly over the surface of the dough. Starting at one of the long sides, roll the dough into a cylinder. Cut the cylinder into 8 equal pieces. Press down on one side of each piece to flatten slightly, then transfer to a pie plate. Repeat with all the pieces.
4. Bake for 20 to 25 minutes, or until the biscuits are golden brown. Remove from the oven and transfer to a wire rack to cool slightly. Whisk together the powdered sugar and milk (and vanilla and cinnamon, if using) and drizzle the icing over the biscuits. Serve warm or at room temperature. Store leftovers in an airtight container at room temperature.


Monday, September 8, 2014

(Healthier) Chocolate Zucchini Muffins


I know summer feels over (well, for most people -- with hot temperatures here and our toddler too little for school, it doesn't feel that different to me!), but here's a way to continue to use zucchinis from summer produce.

While chocolate zucchini muffins certainly seem indulgent, they're better for you than you might suspect - the sugar is cut to 5 tablespoons (from the usual 8 that's in most recipes), there's a few tablespoons of coconut oil, and it's made completely of whole wheat pastry flour.  There are chocolate chips but I think there's approximately 10 chips per muffin which gives it enough that you really taste the chocolate chips but don't go overboard.  However, they're incredibly tasty - my husband couldn't believe when he heard the ingredient list.  He thought they tasted too good!

I've made these twice and they've been a big hit both times!

Chocolate Zucchini Muffins
Taken from: Ambitious Kitchen
Makes 12 muffins

  • 1 ¼ cup whole wheat pastry flour (or white whole wheat flour)
  • 1/3 cup unsweetened cocoa powder
  • 1 teaspoon baking soda
  • ¼ teaspoon salt
  • 2 tablespoons coconut oil
  • 1/3 cup honey
  • 1 teaspoon vanilla
  • 2 eggs
  • 1 cup shredded zucchini (about 1 medium)
  • ¼ cup unsweetened applesauce
  • ½ cup milk (I used almond milk) 
  • ½ cup chocolate chips (I used dark chocolate chips)

  1. Preheat oven to 350 degrees F. Line 12 cup muffin tin with cupcake liners and generously spray inside of liners with nonstick cooking spray.
  2. Squeeze shredded zucchini of excess water with a paper towel.
  3. In a medium bowl, whisk together flour, cocoa powder, baking soda, and salt; set aside.
  4. In the bowl of an electric mixer, add coconut oil, honey, vanilla, eggs; mix on medium-low until smooth and well combined. Add in zucchini, applesauce, and almond milk; mix again. Slowly add in dry ingredients and mix until just combined. Gently fold in chocolate chips.
  5. Evenly divide batter into prepared liners. Bake 20-25 minutes or until toothpick inserted into middle comes out clean. After 5 minutes, remove muffins and transfer to wire rack to finish cooling. Enjoy!

Friday, July 11, 2014

Cranberry (or Cherry) Coffee Cake


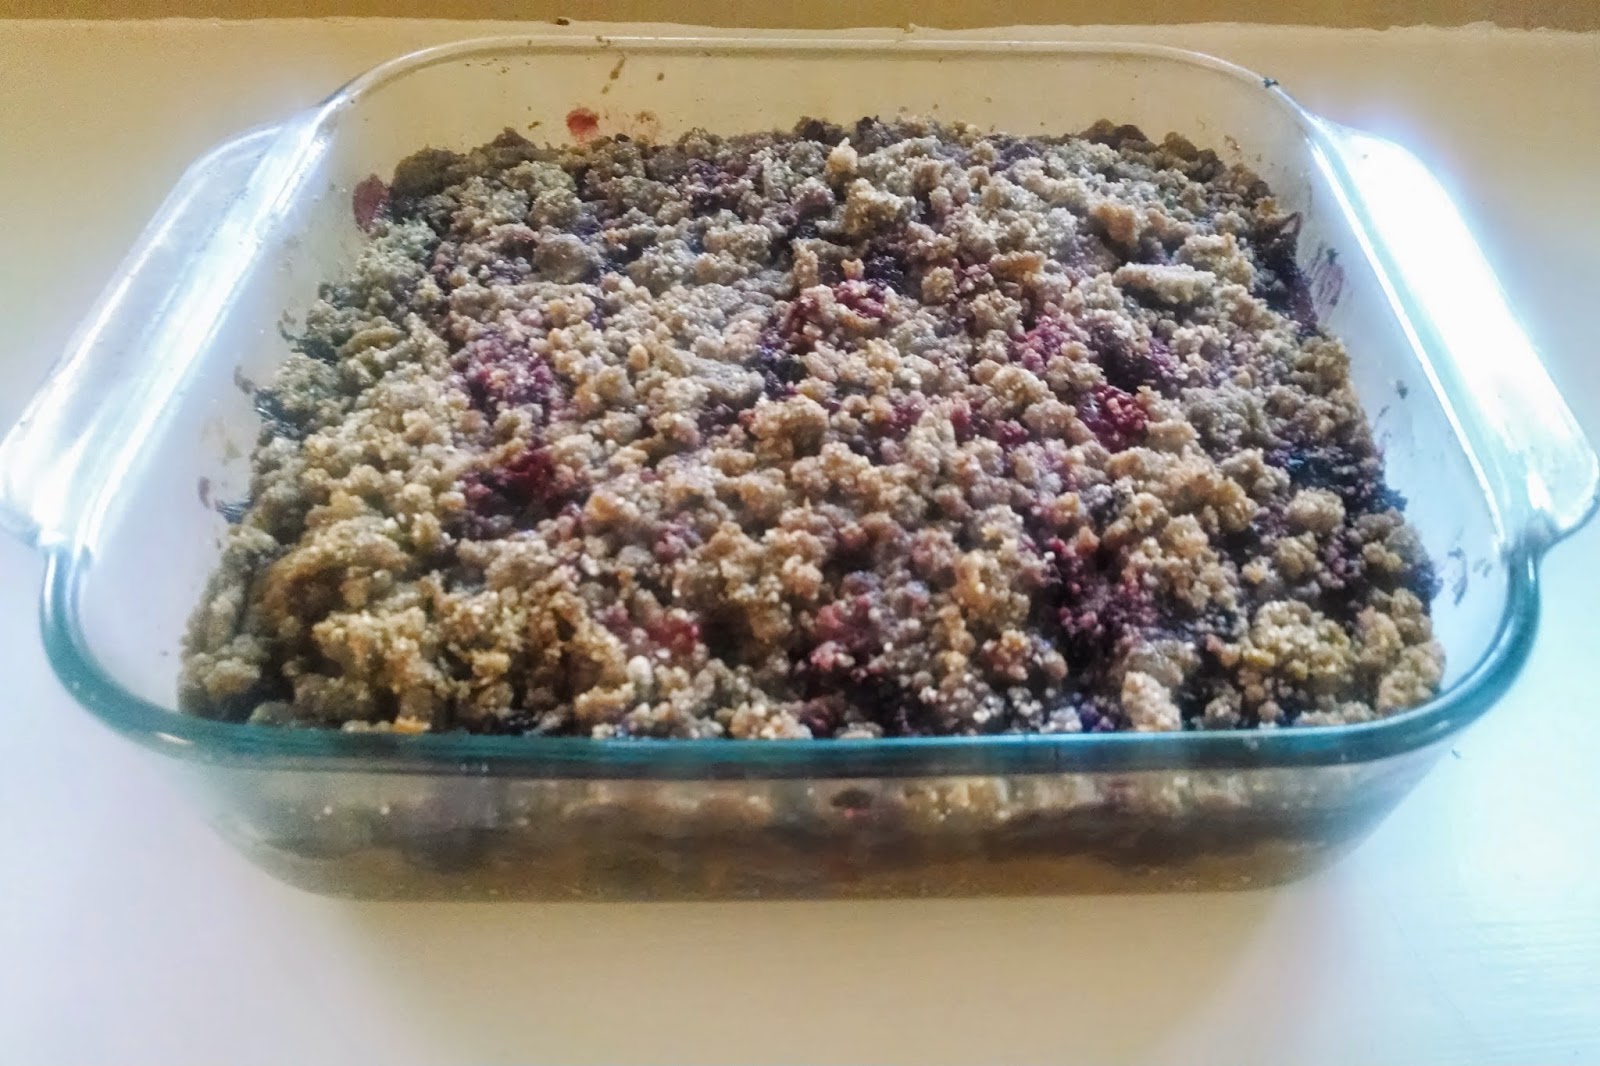
Coffee cake has to be one of the greatest things.  Cake for breakfast? Which obviously means cake with coffee? Genius.  I had a bag (or two) of fresh cranberries that had been sitting in my fridge since Christmas and this was the perfect way to use them. Also, it seemed like a great way to celebrate the 4-day weekend my husband had for the 4th of July.

Of course, to one that doesn't hoard fresh cranberries in their freezer (you're missing out, you know!), this would be amazing with cherries.  Actually, it was my original intent to make this a combination of cherries and cranberries.  I thought the sweetness of the cherries and tartness of the cranberries would be great.  However, I only had fresh cherries and long story short, that didn't work out so well.  Next time, I'll be sure to buy frozen, pitted cherries instead!

Since this recipe would be great with cranberries or cherries, it's one you can make all year long! And it's perfectly acceptable for breakfast or dessert.  The streusel is sweet, I love the thick layer of berries and the cake is nice and airy.  I think I slightly overcooked my cake -- I had a hard time testing it since the layer of berries was so thick.  But it's very forgiving and still turned out great.  We especially liked it after warming it in the microwave (and, of course, with a cup of coffee!).

Cranberry (or Cherry) Coffee Cake
Taken from: King Arthur Flour
Makes about 12 2-inch pieces

Streusel

  • 2 tablespoons butter
  • 1/4 cup brown sugar
  • big pinch of salt
  • 1 teaspoon ground cinnamon
  • 1 teaspoon vanilla extract
  • 1/2 cup all-purpose, white whole wheat flour or almond meal (I did 1/4 cup all-purpose flour and 1/4 cup almond meal)
Filling
  • 8 ounces fresh cranberries or cherries (or a mixture)
  • 2-4 Tbsp sugar (I would omit the sugar if using something besides cranberries)
Batter
  • 1/4 cup (4 Tbsp) butter
  • 1/2 cup brown sugar
  • 1 large egg
  • 1/2 cup plain yogurt
  • 1/4 teaspoon almond extract
  • 1 teaspoon vanilla extract
  • 1/2 teaspoon baking powder
  • 1/2 teaspoon baking soda
  • 1/4 teaspoon salt
  • 1 cup all-purpose or white whole wheat flour (I used 1/2 cup all-purpose and 1/2 cup white whole wheat)
  1. Preheat the oven to 350°F. Lightly grease a 8x8 pan.
  2. To make the streusel: In a large bowl, cream together the butter, sugar, salt, cinnamon, and vanilla. Add the flour/almond meal, beating until even crumbs form. Scoop the mixture into a smaller bowl, and set it aside.
  3. To make the batter: In the same bowl in which you've just made the streusel (you can use a different bowl if you want, but this saves on washing dishes), cream together the butter and brown sugar, beating until smooth. Beat in the egg, scraping the bowl and again beating until smooth. Beat in the yogurt, extracts, baking powder, baking soda, salt, and flour. The mixture will be fairly stiff. Scoop the batter into the prepared pan. 
  4. In a food processor (or by hand), add cranberries and 2 Tbsp sugar and process until very finely chopped. Taste and if it is too tart, add a tablespoon or two more sugar to your liking. (Remember that the streusal and cake will be sweet - I like a tarter fruit to balance that sweetness.) If using cherries, chop or process in food processor.
  5. Dollop the cranberries/cherries on top of the batter. Sprinkle the streusel over all.
  6. To bake the coffeecake: Bake coffeecake for 40 minutes, or until a cake tester inserted into the center comes out clean. Remove it from oven, and cool for 30 minutes before serving (or serve it hot from the oven, if you don't mind it crumbling a bit!) 

Monday, April 14, 2014

My Favorite Whole Wheat Pancake Mix (Large Batch)


This isn't actually a new recipe.  This was originally taken from my post on Pancakes for One (or Two).  We love this recipe so much, it's pretty much the only pancake recipe I use.  And after making this almost weekly for months, I finally realized that you could make a large batch of the dry ingredients.  And then in the morning, you can just portion out however much you need, add some milk (and any add-ins you'd like) and you have pancakes that are all ready to cook! It makes breakfasts go that much more smoothly (which is especially nice when you have a starving toddler grabbing your leg).

Also, I've made some adjustments since the original recipe.  I cut way down on the sugar -- since we usually top ours with something sweet, it doesn't need much in the batter.  I also omitted the oil from the batter and increased the oats slightly.

This recipe below is how much can fit in my storage container, but feel free to double (or triple) the recipe if you have a larger container than I do!

Whole Wheat Pancake Mix
Taken from: Pancakes for One, originally from Joy the Baker
Serves 8-12
  • 4 cups white whole wheat flour (or your flour of choice)
  • 1 1/3 cups oats
  • 2 Tbsp baking powder
  • 1 Tbsp baking soda
  • 1 tsp salt
  • 2 tsp sugar
  • buttermilk (or milk of your choice; I prefer to use leftover whey from making yogurt)
  • butter for cooking (I use 1/2 Tbsp for cooking each batch)
  • Optional add-ins: vanilla, chocolate chips, pecans, banana, pumpkin puree, etc
  1. In a large bowl, whisk together flour, oats, sugar, baking powder, baking soda and salt until well combined.  Store in an airtight container.
  2. When ready to cook, scoop out 1/3 - 1/2 cup of the mixture per person (I have found that I like 1/3 cup plus 2 tablespoons of the dry mixture per person).  Add 3 Tbsp. buttermilk per person to the mixture and any add-ins you'd like.  Add a little more milk or dry mixture to get your desired consistency. 
  3. On medium-low to medium heat, heat a frying pan with 1/2 tablespoon of butter (a nice coat of butter or oil is the only way to make the pancakes nice and crispy on the outside).  Pour in the pancake batter to make whatever pancake shapes you'd like.  Cook until bubbles form and pop on the surface of the pancake (this is usually about 3-4 minutes for me). Flip pancakes over and cook until other other side is nicely browned (this is usually about 3 minutes for me).

Monday, March 3, 2014

Coconut & Vanilla Muffins


When I found this recipe for coconut and vanilla muffins (that just so happened to be topped with cinnamon-sugar, one of our very favorite combinations), I really wanted to try them.  Conveniently, the same week I found this recipe, I was already planning on making an Indian curry that called for canned coconut milk.  While the recipe called for the whole can, I just held back one cup and then waited for the weekend to make these muffins.

They were easy to whip up on Saturday morning with a standard combining of the dry and wet ingredients. And after they came out of the oven, they smelled divine. They tasted great, too, but what a warm, wonderful smell.  As with most baked goods, I think they're the best the first day (especially right out of the oven!) but we also enjoyed them the next day (especially after warmed in the microwave for 10ish seconds).
I might have to make it a tradition that whenever I use canned coconut milk in any recipe, I have to hold a cup of it back and make these muffins!

Coconut & Vanilla Muffins with Cinnamon-Sugar
Taken from: Mel's Kitchen Cafe
Makes 12 muffins

  • 2 large eggs
  • 1 cup canned coconut milk (light or regular -- I looked for the brand with the shortest ingredient list)
  • 2 teaspoons vanilla extract
  • 6 tablespoons coconut oil, melted
  • 1 1/4 cups white whole wheat flour (I substituted about 1/4 cup almond meal for the extra 1/4 cup flour)
  • 1 cup unbleached all-purpose flour
  • 2 teaspoons baking powder
  • 3/4 teaspoon salt
  • 1/2 scant cup granulated sugar
  • Cinnamon and sugar for dusting (I mixed about 1 teaspoon cinnamon to 1 tablespoon of granulated sugar)

  1. Preheat the oven to 350 degrees and lightly grease a 12-cup muffin tin with nonstick cooking spray (or you can line them with paper liners).
  2. In a large bowl, whisk together the eggs, milk, vanilla and coconut oil.
  3. In a large bowl, whisk together the whole wheat flour, all-purpose flour, baking powder, salt and sugar. 
  4. Using a wooden spoon or rubber spatula, add the dry ingredients to the wet ingredients, stirring the batter together until just combined. Don't overmix or the muffins will be tough and dry. It only takes a few stirs to incorporate the batter well enough. The batter will be lumpy and that is ok.
  5. Divide the batter evenly among the prepared muffin tin. Sprinkle lightly with cinnamon and sugar.
  6. Bake for 16-20 minutes until a toothpick inserted into the center of a muffin comes out dry or with a few moist crumbs. Don't overbake.
  7. Serve warm or at room temperature.

Monday, December 9, 2013

Cranberry Nut Bread


This is about the time of year that I start hoarding cranberries.  They only seem to be in grocery stores for November and December and then they vanish until the next year.  This makes me slightly panicky so I start buying and freezing them to use throughout the year.

This cranberry nut bread is one of my favorite ways to use them.  It's my great aunt's recipe, which makes me love it all the more.  I make this every year in November or December (it often graces our table at Thanksgiving) and we enjoy it for breakfast, snacks or dessert. I think it goes especially well with a cup of coffee or tea!

I've made a few changes to the recipe.  I've substituted some white whole wheat flour and also added in flaxseed meal.  I've reduced the sugar and added a sprinkle of raw sugar on top of the bread.  Regardless of the slight changes, it's a recipe I love and definitely one that I want my family to continue to make.

Cranberry Nut Bread
Taken from: My Great Aunt Eleanor
Makes 1 loaf

  • 1 tsp. salt
  • 1 1/2 tsp. baking powder
  • 1/2 tsp. baking soda
  • 3/4 c. sugar
  • 2 c. flour (I use 1 cup all-purpose and 1 cup white whole wheat)
  • 2 Tbsp. flaxseed meal (optional)
  • juice and zest of 1 orange
  • 2 Tbsp. butter
  • 1 egg, beaten
  • 1/2 cup boiling water
  • 1 cup chopped nuts (I use walnuts)
  • 1 cup chopped cranberries
  • 1 Tbsp. raw sugar, for sprinkling (optional)


  1. Preheat oven to 325. Grease a bread pan with cooking spray. 
  2. Sift together salt, baking power, baking soda, sugar and flour.  Stir in flaxseed meal.
  3. In a separate bowl, combine orange juice and zest, butter and 1/2 cup boiling water.
  4. Combine wet and dry ingredients (sometimes I need to add a bit more boiling water to mix all together).
  5. Add chopped nuts and cranberries to the mixture.  Pour into greased bread pan and top with raw sugar, if desired.
  6. Bake for 45-60 minutes until a toothpick comes out clean.

Wednesday, November 20, 2013

Pumpkin Scones


Another pumpkin recipe (yes, there is a borderline obsession).  I made these scones last year as well but never got around to blogging about them but I definitely did not forget about them!

Most of the time, I skip the glazes on breakfast foods and desserts.  I just think it's not necessary and often is so sweet that it detracts from the flavor.  These pumpkin scones were no exception -- the first time I made them, I only did a drizzle of the spiced glaze which we enjoyed.  The second time, I omitted both glazes and just used a sprinkle of raw sugar instead, which was also great.  Omitting the glaze gives you a slightly sweetened scone that is pretty perfect with a cup of coffee.  My 10-month old loved this as well -- she ate an entire scone and did so with just gusto, you would think she hadn't eaten in days (not 2 hours).   Feel free to tailor this to your liking - no glaze, one glaze or both!

Also, like our favorite blueberry scones, these are so easy to freeze the unbaked scones and then just pop as many as you want into a preheated oven. Perfect for easy, fresh scones in the morning!

Since neither my husband nor I like pumpkin pie (we'll be making my mother-in-law's pecan pie recipe), we decided it would be festive -- and delicious -- to have these for breakfast Thanksgiving morning instead!

Pumpkin Scones
Taken from: Sweet Pea's Kitchen
Makes 12 scones

**Feel free to omit both glazes, just use one or use both -- whatever is your liking!

For Scones:
  • 2 cups all-purpose flour
  • 1/4 cup and 3 tablespoons granulated sugar
  • 1 Tablespoon baking powder
  • 1/2 teaspoon salt
  • 1/2 teaspoon ground cinnamon
  • 1/2 teaspoon ground nutmeg
  • 1/4 teaspoon ground cloves
  • 1/4 teaspoon ground ginger
  • 6 tablespoons cold butter, cut into 1-inch cubes
  • 1/2 cup canned pumpkin puree
  • 3 tablespoons half-and-half
  • 1 large egg
  • raw sugar, for sprinkling (optional)
For the Powdered Sugar Glaze (I omitted):
  • 1 cup plus 1 tablespoon powdered sugar
  • 2 Tablespoons milk
For the Spiced Glaze (I've halved this and drizzled it on):
  • 1 cup plus 3 tablespoons powdered sugar
  • 2 tablespoons milk
  • 1/4 teaspoon ground cinnamon
  • 1/8 teaspoon ground nutmeg
  • 1 pinch ground ginger
  • 1 pinch ground cloves

  1. If cooking immediately, preheat the oven to 425 degrees F. Line a baking sheet with parchment paper; set aside.
  2. In the bowl of a stand mixer fitted with fit the paddle attachment, stir together the flour, sugar, baking powder, salt, cinnamon, nutmeg, cloves and ginger. Add the butter and toss with a fork to coat with the flour mixture. Mix on medium-low speed until the texture resembles coarse cornmeal, with the butter pieces no larger than small peas. (You could also do this without a stand mixer by cutting the butter with two knives or a pastry blender until it resembles coarse cornmeal.)
  3. In a separate bowl, whisk together the pumpkin, half-and-half and egg. Fold wet ingredients into dry ingredients, and form the dough into a ball (I had to add about 1 tablespoon of water). Pat out dough onto a lightly floured surface and form into a 1-inch thick rectangle about 7 inches by 12 inches. Use a large knife to slice the dough making three equal portions. Cut each of the portions in an X pattern (four pieces) so you end up with 12 triangular slices of dough. 
  4. If you are baking immediately, place on prepared baking sheet. If desired, sprinkle scones with raw sugar. Bake for 14-16 minutes, or until light brown. Place on wire rack to cool.
  5. If freezing unbaked scones, freeze on a baking sheet in a single layer until firm (I set the timer for 30 minutes), tightly wrap in plastic wrap and place in a ziploc freezer bag. When ready to bake, just pop as many scones as you would like onto a baking sheet (sprinkle with raw sugar, if desired), and place into a preheated 425 degree oven straight from the freezer (no need to thaw). Bake for 15-20 minutes.
  6. OPTIONAL: While the scones are cooling, make the powdered sugar glaze by mixing the powdered sugar and milk together until smooth. When scones are cool, use a pastry brush to spread plain glaze over the top of each scone. Allow to firm.
  7. OPTIONAL: While the powdered sugar glaze is firming, combine all of the ingredients for the spiced glaze. Drizzle over each scone and allow the icing to dry before serving (about an hour).

Sunday, September 22, 2013

Dutch Babies


Hello, old friends.  After a one-year sabbatical to hone my cooking skills, I was back in the kitchen recently to make Anne's birthday breakfast.  I went deep into the family recipe vault to find a childhood favorite of mine: Dutch babies!  I had forgotten the name of this dish, but I knew my mom would remember.  I asked her about that "sorta lemony French toast she used to make when I was growing up," and she knew instantly what it was.  You may also recognize this as a "German pancake," "Bismarck," or "Dutch puff"--or, if you're one of the blog's many German readers--a "pfannkuchen" (if Wikipedia can be trusted).

This is a very simple meal (I made it), and quite delicious (we scarfed down the whole thing in one sitting).  While it bakes, you have time to fry up some bacon or sausage.  If you use Canadian bacon and/or Polish sausage, you truly have an international breakfast.  (Vegetarians can substitute French roast coffee.)

Dutch Babies
Taken from: Bryant's mom
Serves 2-3
  • 3 eggs
  • 1 tsp salt
  • 1/2 cup flour
  • 1/2 cup milk
  • 1-3 Tbsp butter (1 seems to work well but feel free to use more)
  • Lemon juice to taste
  • Powdered sugar to taste
  1. Preheat oven to 450.
  2. Beat eggs, salt, flour, and milk in stand mixer or other bowl.
  3. Grease an 8x8 (or 9x9) baking dish generously with the butter and then pour mixture into dish.
  4. Cook until babies puff, which is about 10 minutes
  5. Cut into squares and serve with lemon juice and powdered sugar.

Monday, April 15, 2013

Overnight Cinnamon Rolls


We just love an excuse to have brunch in our family.  So when friends of ours were coming over on a Saturday morning, I jumped at the chance to host brunch.  And since it had been a couple years since I had made cinnamon rolls, this seemed like the perfect excuse.  However, I obviously didn't want to be up at dawn in order to have a 10 am brunch so these overnight cinnamon rolls seemed like a perfect option.  I made the dough and prepped the cinnamon rolls the afternoon before and let them hang out in our fridge overnight.  It definitely made for a very leisurely morning the next day because all I had to do was have the rolls rise a little more and then cook them.  Definitely a great way to have brunch!

Of course, you can't go wrong with cinnamon rolls -- delicious and such a treat!  I think I slightly overcooked mine so I'd recommend checking them after 25 minutes of baking.  I also like less icing than most people (I think the cinnamon-sugar should be the star!), so I halved the icing recipe below and that worked great for us.

We reheated the leftovers in the microwave on low power the next few days for breakfast which turned out really well.  I highly recommend serving them warm!

Overnight Cinnamon Rolls
Taken from: Alton Brown
Makes 12 rolls

Dough:
  • 4 large egg yolks, room temperature (I actually used 2 egg yolks and 2 whole eggs)
  • 1 large whole egg, room temperature (I actually used 2 egg yolks and 2 whole eggs)
  • 2 ounces sugar, approximately 1/4 cup (I used a very scant 1/4 cup)
  • 3 ounces unsalted butter, melted, approximately 6 tablespoons
  • 6 ounces buttermilk, room temperature (I used leftover whey)
  • 20 ounces all-purpose flour, approximately 4 cups, plus additional for dusting
  • 1 package instant dry yeast, approximately 2 1/4 teaspoons
  • 1 1/4 teaspoons kosher salt
  • Vegetable oil or cooking spray
Filling:
  • 8 ounces light brown sugar, approximately 1 cup (I did a loose 1 cup)
  • 1 tablespoon ground cinnamon
  • Pinch salt
  • 3/4-ounce unsalted butter, melted, approximately 1 1/2 tablespoons
Icing (I like less icing than most people so I halved the recipe below and was happy with the amount):
  • 2 1/2 ounces cream cheese, softened, approximately 1/4 cup
  • 3 tablespoons milk
  • 5 1/2 ounces powdered sugar, approximately 1 1/2 cups
  1. For the dough: in the bowl of a stand mixer with the whisk attachment, whisk the egg yolks, whole egg, sugar, butter, and buttermilk. Add approximately 2 cups of the flour along with the yeast and salt; whisk until moistened and combined. Remove the whisk attachment and replace with a dough hook. Add all but 3/4 cup of the remaining flour and knead on low speed for 5 minutes. Check the consistency of the dough, add more flour if necessary; the dough should feel soft and moist but not sticky. Knead on low speed 5 minutes more or until the dough clears the sides of the bowl. Turn the dough out onto a lightly floured work surface; knead by hand about 30 seconds. Lightly oil a large bowl. Transfer the dough to the bowl, lightly oil the top of the dough, cover and let double in volume, 2 to 2 1/2 hours.
  2. Combine the brown sugar, cinnamon and salt in a medium bowl. Mix until well incorporated. Set aside until ready to use.
  3. Butter a 9 by 13-inch glass baking dish. Turn the dough out onto a lightly floured work surface. Gently shape the dough into a rectangle with the long side nearest you. Roll into an 18 by 12-inch rectangle. Brush the dough with the 3/4-ounce of melted butter, leaving 1/2-inch border along the top edge. Sprinkle the filling mixture over the dough, leaving a 3/4-inch border along the top edge; gently press the filling into the dough. Beginning with the long edge nearest you, roll the dough into a tight cylinder. Firmly pinch the seam to seal and roll the cylinder seam side down. Very gently squeeze the cylinder to create even thickness. Using a serrated knife, slice the cylinder into 1 1/2-inch rolls; yielding 12 rolls. Arrange rolls cut side down in the baking dish; cover tightly with plastic wrap and store in the refrigerator overnight or up to 16 hours.
  4. Remove the rolls from the refrigerator and place in an oven that is turned off. Fill a shallow pan 2/3-full of boiling water and set on the rack below the rolls. Close the oven door and let the rolls rise until they look slightly puffy; approximately 30 minutes. Remove the rolls and the shallow pan of water from the oven.
  5. Preheat the oven to 350 degrees F.
  6. When the oven is ready, place the rolls on the middle rack and bake until golden brown, or until the internal temperature reaches 190 degrees F on an instant-read thermometer, approximately 25-30 minutes.
  7. While the rolls are cooling slightly, make the icing by whisking the cream cheese in the bowl of a stand mixer until creamy. Add the milk and whisk until combined. Sift in the powdered sugar, and whisk until smooth. Spread over the rolls and serve immediately.


Friday, March 22, 2013

Whole Wheat Pumpkin Waffles


For normal people, it's way past pumpkin season.  It's time to move on to delicious things like strawberries and asparagus. And while I'm clearly enjoying the beginnings of spring (I just finished off some roasted asparagus as part of my lunch), I'm not giving up my precious jars of pumpkin puree. And don't get me started on the bags of cranberries that I bought in the winter and are now in my freezer.

So either bookmark this pumpkin waffle recipe to make 6 months from now or join me in continuing to enjoy pumpkin goods all year round.  And when those baked goods include whole wheat flour and not much oil or sugar, you can feel a whole lot better about having these for breakfast (and promptly dousing them with maple syrup).  They freeze beautifully so I often double the recipe and keep them in the freezer.  When I want a waffle for breakfast, it goes straight from the freezer to the toaster.  It makes for an easy (and tasty) morning!


Whole Wheat Pumpkin Waffles
Taken from: Tasty Kitchen
Makes 6 waffles
  • 1 cupMilk (I use leftover whey)
  • 1 whole Egg
  • ½ cup Pumpkin Puree
  • ½ teaspoon Vanilla Extract
  • 2 Tablespoons Canola Oil (you could also use melted butter or coconut oil instead)
  • 2 Tablespoons Packed Brown Sugar
  • ¾ cups Whole Wheat Flour (I might increase this to 1 cup and decrease the all-purpose to 1/4 cup)
  • ½ cups All-purpose Flour (as mentioned above, I might decrease this to 1/4 cup to increase the whole wheat flour to 1 cup)
  • 2 teaspoons Baking Powder
  • ¼ teaspoons Salt
  • ½ teaspoons Cinnamon
  • ⅛ teaspoons Nutmeg

  1. Preheat waffle iron.
  2. In a large bowl, combine milk, egg yolk, pumpkin, vanilla, oil and brown sugar together. Place egg white in a separate smaller bowl and beat with a hand mixer until firm peaks form. Set aside. Pour in remaining dry ingredients to the wet and slowly incorporate. Fold egg whites into waffle batter.
  3. Spray waffle iron with nonstick cooking spray. Pour about 1/2 cup of batter onto the waffle iron. Close the top slowly. Cook about 2 minutes or until waffles are crispy. (If you like them crispy, you can cook them a little longer.  I like mine slightly underdone so they get crispy in the toaster when I eat them at a later time. You can cook yours how you like them.)
  4. Serve immediately, preferable with maple syrup.
  5. Note: You can freeze any extra waffles in plastic food storage bags. On those busy mornings, pop them in the toaster!

Wednesday, March 6, 2013

Pancakes for One (or Two)


Now that I stay at home, lunches look a little different for me.  When I worked in an office, I always brought lunch (usually leftovers).  However, now that I'm home and if leftovers are nowhere to be found, I have a couple other things I can make.  Eggs are always a good choice and we almost always have some on hand.  However, I'm always up for other breakfast foods at any time of the day.

So I recently found myself having nothing readily available for lunch.  It was a perfect excuse to make some pancakes.  Even better, I had found this recipe for a single serving of pancakes.

This recipe worked out even better than I had imagined!   It made for a nice and tall pancake, soft on the inside and crispy on the outside (if you like crispy on the outside, make sure to use enough oil in the pan).

If you double the recipe (and don't want to share), you can always refrigerate the leftovers and then pop them in the toaster to reheat.

PS - If you happen to be snowed in today, these made for a great breakfast!

Pancakes for One 
(You can double the recipe to serve two or if you want some leftovers)
Taken from: Joy the Baker
  • 1/3 cup all-purpose flour (I used white whole wheat)
  • 1 tablespoon rolled oats (quick cooking or regular)
  • 2 teaspoons sugar
  • 1/2 teaspoon baking powder
  • 1/4 teaspoon baking soda
  • pinch of salt
  • 1 Tablespoon canola oil (plus extra for the pan)
  • 1/4 cup plus 2 Tablespoons milk (buttermilk is best,but you could also try regular or other kinds of milk)
  • dash of vanilla extract
  • Add-ins (optional): small handful semi sweet chocolate chips, toasted pecans, etc (I did not add anything)
  • Toppings (optional): peanut butter, maple syrup, cinnamon-sugar, banana (except I hate banana)

  1. In a small bowl, whisk together flour, oats, sugar, baking powder, baking soda and salt.  Add the oil, vanilla extract and buttermilk, and stir to combine.  (The mixture will be thick.)  If using, fold in the chocolate chips and/or other add-ins. 
  2. Heat a frying pan with a teaspoon of oil (I actually used a tablespoon to make the pancakes nice and crispy on the outside).  Pour in the pancake batter and spread some with the back of a spoon.  Cook over medium heat until bubbles form and pop on the surface of the pancake.
  3. Flip.  Cook until golden brown.  Serve with whatever toppings you like. 

Tuesday, November 27, 2012

Cinnamon-Sugar Pull-Apart Bread


I've been eyeing this cinnamon-sugar pull apart bread recipe for a long time but kept holding out for a special occasion. When my husband finished up a long rotation, it was not only a reason to make homemade cheese-its but also a great excuse to finally make this pull-apart bread.  It also sounded like an ideal recipe because he just so happens to love the cinnamon-sugar combination (but who doesn't?).

Part of the reason I was saving this recipe for a special occasion was because it's definitely a treat breakfast (sugar + butter + flour). Additionally, there are several steps involved in making the bread.  None are hard, but, typical of any yeast bread recipe, two separate rises are needed.  However, I loved that I could prep part of the recipe the day before, refrigerate the dough overnight, and then finish the recipe the next morning.

This bread was everything I had expected. It was incredibly soft and delicious and I think it tasted like the inside of a cinnamon roll.  The top of the bread does get a little crunchy and I loved the texture contrast.  Also, it's just fun to eat with your fingers, too.  We ate this for breakfast for 3 mornings straight (warmed slightly in the microwave). 

We've already decided this cinnamon-sugar pull-apart bread will be our new Christmas morning breakfast tradition!


Cinnamon-Sugar Pull-Apart Bread
Taken from: Joy the Baker (she also has some pictures of how to make the recipe so feel free to click on the link)
  • 3  cups all-purpose flour
  • 1/4 cup + 1 teaspoon granulated sugar
  • 2 1/4 teaspoons (1 envelope) active dry yeast
  • 1/2 teaspoon salt
  • 4 tablespoons unsalted butter
  • 1/3 cup whole milk
  • 1/4 cup warm water (should be between 100-110 degrees F)
  • 2 large eggs, at room temperature
  • 1 teaspoon pure vanilla extract
For the Filling:
  • 1 cup granulated sugar
  • 2 teaspoons ground cinnamon
  • 1/2 teaspoon fresh ground nutmeg
  • 4 tablespoons unsalted butter, melted
  1. To activate yeast, whisk yeast and 1 teaspoon of sugar in a small bowl, then add the warm water. Allow the mixture to sit for about 5 minutes, until the mixture is foamy and frothy.  
  2. In a large mixing bowl, whisk together 2 cups flour, 1/4 cup sugar, and salt.  Set aside.
  3. In a small saucepan, melt together milk and butter until butter has just melted.  Remove from the heat and add vanilla extract.  Let mixture stand for a minute or two, or until the mixture registers 115 to 125 degrees F.
  4. Pour the milk mixture and activated yeast mixture into the dry ingredients and mix with a spatula.  Add the eggs and stir the mixture until the eggs are incorporated into the batter.  The eggs will feel soupy and it’ll seem like the dough and the eggs are never going to come together.  Keep stirring.  Add the remaining 3/4 cup of flour and stir with the spatula for about 2 minutes.  The mixture will be sticky.  Add remaining 1/4 cup of flour, 1 tablespoon at a time, only if needed.  
  5. Place the dough is a large greased bowl.  Cover with plastic wrap and a clean kitchen towel.  Place in a warm space and allow to rest until doubled in size, about 1 hour.  *The dough can be risen until doubled in size, then refrigerated overnight for use in the morning.  If you’re using this method, just let the dough rest on the counter for 15-30 minutes before following the roll-out directions below.
  6. While the dough rises, whisk together the sugar, cinnamon and nutmeg for the filling.  Set aside.  Melt 4 tablespoons of butter.  Set aside.  Grease and flour a 9x5x3-inch loaf pan.  Set that aside too.
  7. Deflate the risen dough and knead about 2 tablespoons of flour into the dough.  Cover with a clean kitchen towel and let rest for 5 minutes.  On a lightly floured work surface, use a rolling pin to roll the dough out.  The dough should be 12-inches tall and about 20-inches long.  If you can’t get the dough to 20-inches long… that’s okay.  Just roll it as large as the dough will go.  Use a pastry brush to spread melted butter across all of the dough.  Sprinkle with all of the sugar and cinnamon mixture.  It might seem like a lot of sugar but it's amazing that way.
  8. Slice the dough vertically, into six equal-sized strips.  Stack the strips on top of one another and slice the stack into six equal slices once again.  You’ll have six stacks of six squares.  Layer the dough squares in the loaf pan like a flip-book.  Place a kitchen towel over the loaf pan and allow in a warm place for 30 to 45 minutes or until almost doubled in size.
  9. While dough is rising, place a rack in the center of the oven and preheat to 350 degrees F.  Place loaf in the oven and bake for 30 to 35 minutes, until the top is very golden brown.  The top may be lightly browned, but the center may still be raw.  A nice, dark, golden brown will ensure that the center is cooked as well.
  10. Remove from the oven.  The instructions say to rest for 20-30 minutes but let's be honest, I didn't do that. Run a butter knife around the edges of the pan to loosen the bread and invert onto a clean board.  Place a cake stand or cake plate on top of the  upside down loaf, and carefully invert so it’s right side up.  Serve warm with coffee or tea.
  11. I think this bread is best served the day it’s made, but it can also be wrapped and kept at room temperature for up to 2-3 days (we just reheated parts on low heat in the microwave and enjoyed this for breakfast for 3 days).

Monday, October 29, 2012

Pumpkin Pancakes with Cinnamon Streusel


So...another pumpkin (and streusel) recipe.  But seriously, what's a girl to do when work is cancelled, thanks to Hurricane Sandy? Make pumpkin cinnamon streusel pancakes, that's what (and take very dark pictures of them, thanks to Hurricane Sandy).

I really liked this recipe -- the pancakes ended up being light and fluffy. And of course, the cinnamon-streusel topping was a great touch. And not only does the streusel go on top of the pancakes but it cooks on the bottom side as well! It gave tons of flavor and texture and I found it completely unnecessary to serve the pancakes with any butter or syrup. This was also a very simple recipe to whip up so it didn't take much time at all to enjoy a relaxing breakfast.

And best yet? Leftovers for tomorrow morning!

Pumpkin Pancakes with Cinnamon-Streusel Topping
Taken from: Two Peas and their Pod
Serves 4

For the cinnamon streusel (below, I halved the amount of streusel which I thought was perfect but feel free to double if you want to):
  • 1/4 cup all-purpose flour
  • 1/4 brown sugar, packed
  • 1/2 teaspoon ground cinnamon
  • 3 tablespoons cold unsalted butter, cut into chunks
To make the pancakes:
  • 3/4 cup all-purpose flour
  • 1/2 cup whole wheat flour
  • 2 tablespoons light brown sugar
  • 2 teaspoons baking powder
  • 1/4 teaspoon salt
  • 1 teaspoon ground cinnamon
  • 1/4 teaspoon nutmeg
  • 1/8 teaspoon ground ginger
  • 1/8 teaspoon ground cloves
  • 1 cup milk
  • 1/2 cup canned pumpkin (not pumpkin pie filling)
  • 1 large egg
  • 2 tablespoons canola oil
  • 1 teaspoon vanilla extract
  1. First, make the cinnamon streusel. In a medium bowl, combine flour, brown sugar, cinnamon, and butter. Mix together with your hands or a fork, until you have a crumbly mixture. Set aside.
  2. In a large bowl, whisk together flours, brown sugar, baking powder, salt, cinnamon, nutmeg, ginger, and cloves. Set aside.
  3. In a medium bowl, whisk together milk, egg, pumpkin, canola oil, and vanilla extract. Add wet ingredients to the flour mixture and whisk until combined. Let batter rest for several minutes while griddle is heating.
  4. Heat a griddle or pan to medium low. Coat with cooking spray. Drop 1/4 or 1/3 cup of batter onto heated skillet. Add 1/2 - 2 tablespoons of the cinnamon streusel. Cook on the first side until bubbles begin to form, about 2-3 minutes. Carefully flip pancake over and cover with cinnamon streusel. Cook for another 2-3 minutes or until golden brown. Continue this process to make the rest of the pancakes.

Thursday, October 11, 2012

Pumpkin Bread


So I held off making anything pumpkin until October this year but this pumpkin bread was a wonderful way to welcome back my favorite season.  This bread was moist and so flavorful.  It's actually made with some whole wheat flour and olive oil (surprise!) although it's always hard to categorize quick breads as health food.  Even so, I didn't mind having a slice or two for breakfast the next day and then as a snack pretty much everyday after that.

I added a cinnamon streusel topping because you really can't go wrong with streusel.  Feel free to leave it off but I liked it both for the flavor and for the texture change. 

This bread keeps really well and still tastes wonderful, even though we're on day 4.  We liked it both at room tempeature as well as heated in the microwave.

Now that fall is in full swing and I happen to have a huge can of pumpkin to finish up, any good recipe ideas? Pumpkin scones and pumpkin waffles are at the top of my list!

Pumpkin Bread with Streusel Topping
Bread taken from: Blissfully Delicious
Makes 1 loaf
  • Cooking spray
  • 3-1/4 oz. (3/4 cup) whole wheat flour
  • 3 oz. (2/3 cup) unbleached all-purpose flour
  • 1 tsp. ground cinnamon
  • 1 tsp. baking soda
  • 1/2 tsp. baking powder
  • 1/2 tsp. ground nutmeg
  • 1/4 tsp. table salt
  • 2 large eggs
  • 1 cup canned pumpkin purée
  • 1/2 cup packed light brown sugar
  • 1/3 cup olive oil
  • 1/3 cup honey
Streusel Topping (optional):
  • 1 1/2 Tbsp. all-purpose flour
  • 3 Tbsp. old-fashioned oats
  • 3 Tbsp. packed light brown sugar
  • 1/4 teaspoon ground cinnamon
  • pinch salt
  • 2 tablespoons cold unsalted butter, cut into small cubes
  1. Position a rack in the center of the oven and heat the oven to 350°F. Spray a 9×5-inch loaf pan with cooking spray.
  2. In a medium bowl, whisk both flours, cinnamon, baking soda, baking powder, nutmeg, and salt. In a large bowl, whisk the eggs, pumpkin, sugar, oil, and honey until well combined. Add the dry ingredients to the wet and stir with a large spoon just until evenly incorporated.
  3. To make the streusel: Stir the flour, oats, brown sugar, cinnamon and salt together in a medium bowl. Add the butter, and use a pastry cutter to work it into dry ingredients until the mixture resembles coarse crumbs. Set aside while you make the batter.
  4. Spoon the batter into the prepared pan and smooth the top. Tap the pan on the counter a few times to settle the batter. Top with streusel, if using.
  5. Bake until the top is browned and a wooden skewer inserted in the center comes out clean, 40 to 45 minutes. (If the bread begins to brown too much before it’s fully baked, lay a piece of aluminum foil on top.) Cool in the pan for 15 minutes and then transfer the bread to a rack to cool completely before slicing.

Saturday, October 6, 2012

Top Pot Old-Fashioned Doughnuts


I almost feel like this is a confession but...I fried something. At home. For the first time.  But I guess if you are going to fry something, it might as well be doughnuts, right?  And if it's going to be doughnuts, it might as well be a Top Pot recipe.

The last time we were out in Seattle, my husband took me to Top Pot doughnuts for the first time.  Top Pot is a famous doughnut shop out in the Pacific Northwest and while we spent a small fortune on 2 doughnuts, they really were delicious.  And since we don't live in Seattle and my frugal self balks at spending $8 on 2 doughnuts, I decided to make these at home.

Truth be told, I don't love doughnuts like some people do.  However, my husband likes them and doughnuts definitely are the best when they're fresh.  And it doesn't get much fresher than if you make them yourself!

Another confession: I didn't have the proper equipment.  Instead of a doughnut cutter, I used a beer glass and a top from a canola oil container to make the large and small holes, which worked out fine for me (feel free to experiment!).  It also worked out to use the oil container top to make doughnut holes.  I didn't have a candy thermometer and while that still was okay, I don't think I would encourage that method because working with hot oil is no joke.

Not surprisingly, we both loved these doughnuts.  The original recipe came with a glazed topping which was great but I might have liked it even more when we coated them with cinnamon-sugar mixture instead.


Top Pot's Sour Cream Old Fashioned Doughnuts
Taken from: Top Pot Hand-Forged Doughnuts: Secrets and Recipes for the Home Baker
Makes: 12-13 doughnuts (or many doughnut holes)
  • 2 1/4 cups/255 g cake flour, plus more for rolling and cutting
  • 1 1/2 tsp baking powder
  • 1 tsp iodized salt
  • 3/4 tsp ground nutmeg
  • 1/2 cup/100 g sugar
  • 2 tbsp shortening, trans-fat-free preferred (I used softened butter instead)
  • 2 large egg yolks
  • 2/3 cup/165 ml sour cream
  • Canola oil, for frying
  • Glaze or cinnamon-sugar mixture  for topping(I used about 1/4 cup white sugar and 1 tablespoon cinnamon); see below for glaze recipe
    1. Sift the flour, baking powder, salt, and nutmeg together into a mixing bowl, and set aside.
    2. In a stand mixer fitted with the paddle attachment, mix the sugar and shortening for 1 minute on low speed, until sandy. Add the egg yolks, then mix 1 more minute on medium speed, scraping the sides of the bowl with a rubber spatula if necessary, until the mixture is light colored and thick.
    3. Add the dry ingredients to the wet ingredients in three separate additions, alternating with the sour cream, mixing until just combined on low speed and scraping the sides of the bowl each time. The dough will be sticky, like cookie dough.
    4. Transfer the dough to a clean bowl and refrigerate, covered with plastic wrap, for 45 minutes (or up to 24 hours).
    5. Using a candy thermometer to measure the temperature, heat oil (at least 2 inch deep) in a deep fryer, large pot, or high-sided frying pan to 325°F. Roll chilled dough out on a generously floured counter or cutting board to 1/2 inch thick, or about 8 inches in diameter, flouring the top of the dough and the rolling pin as necessary to prevent sticking. Cut into as many doughnuts and holes as possible, dipping the cutter into flour before each cut. Fold and gently reroll the dough (working with floured hands makes the dough less sticky), and cut again.
    6. Shake any excess flour off the doughnuts before carefully adding them to the hot oil a few at a time, taking care not to crowd them. Once the doughnuts float, fry for 15 seconds, then gently flip them. Fry 75 to 90 seconds, until golden brown and cracked, then flip and fry the first side again for 60 to 75 seconds, until golden. Drain a rack set over paper towels/absorbent paper.
    7. Coat in glaze or cinnamon-sugar.
    Simplest Vanilla Glaze
    • 3 1/2 cups/350 g confectioners’ sugar, sifted
    • 1 1/2 tsp light corn syrup (I used honey instead)
    • 1/4 tsp iodized salt
    • 1/2 tsp vanilla extract
    • 1/3 cup/75 ml plus 1 tbsp hot water, plus more if needed
    1. Place the ingredients in a large mixing bowl or in the work bowl of a stand mixer fitted with the paddle attachment. Using a whisk, or with the machine on low speed, blend until the mixture is smooth and all the sugar has been incorporated, scraping the sides of the bowl with a rubber spatula, if necessary. If the glaze seems to thick, add more hot water, a teaspoon at a time.
    2. To glaze, dip one side of each hot doughnut into the warm glaze, and let dry 10 to 15 minutes before serving.

    Tuesday, September 18, 2012

    Baked Oatmeal with Fruit


    I figure if a recipe is good enough that I've made it three times in the last few months (which is a lot for me), it needs to be on this blog!  Selfishly, another reason I wanted to blog about this baked oatmeal is that I use my blog as an index of dishes I want to make again.  I really liked this -- it made such a great breakfast or snack -- but I kept forgetting the hyperlink to the recipe.  I knew I had to write about it for no other reason than I have no excuse for forgetting the recipe from now on!

    I love this recipe and its versatility.  I usually make this recipe on the weekend and then we have it for breakfast or a mid-morning snack throughout the week.  It keeps very well in the fridge for several days and we just warm a piece in the microwave for a really quick and filling breakfast.  My favorite way to make this is probably with frozen mixed berries (Trader Joe's frozen very cherry blend bag is great) but it was also delicious with blueberries and peaches, too.  I imagine it would be great with apples or pears as well for a more fall/winter breakfast!

    Baked Oatmeal with Fruit
    Taken from: Super Natural Every Day via Tasty Type
    Serves 6-8
    • 2 cups rolled oats 
    • 1/3 cup real maple syrup (sometimes I add about 2 tablespoons of brown sugar and 3-4 tablespoons of maple syrup instead)
    • 1 teaspoon baking powder
    • 1 - 1 1/2 teaspoons cinnamon
    • 1/2 teaspoon salt
    • 2 scant cups milk (any kind) 
    • 1 egg
    • 2 tablespoons unsalted butter, melted
    • 2 teaspoons vanilla
    • 2 10-ounce packages of frozen fruit (you could also use fresh fruit here as well) - in the past, I've used mixed berries, fresh peaches, blueberries, etc.
    • 1/2 cup sliced or chopped nuts (almonds or walnuts are my go-tos)
    1. Preheat your oven to 375 degrees.
    2. Butter or oil and 8-inch baking dish. Spread the peaches evenly in the bottom of the pan and set aside.
    3. Combine: oats, baking powder, cinnamon, and salt. Stir together. Sprinkle over the peaches in the prepared pan. Set aside.
    4. In another bowl, combine: maple syrup, rice milk, egg, half of the melted butter and vanilla. Whisk together completely. Slowly pour this over the oats and peaches in the pan. Shake or jiggle the pan gently to release any air bubbles.
    5. Sprinkle the almonds on top.
    6. Place the pan on a cookie sheet in the preheated oven. Bake for approximately 45 minutes, until the center is cooked through and fluffy. Let cool a bit.  Can serve with extra maple syrup if desired (although I never think it needs it). Store leftovers covered in fridge.

    Wednesday, August 29, 2012

    Raspberry (or Blueberry) Coffee Cake


    Saturday mornings are some of my favorite times.  I love going to the farmers market and then making a nice breakfast for us to enjoy.  This berry coffee cake was a last-minute idea but I had all the ingredients on hand (albeit a few substitutions).  And even better, I made the cake, stuck it in the oven and went off to the farmers market while my husband stayed home and read.  I got home about 5 minutes before the coffee cake was done -- I love that there was hardly any waiting time until I could eat this!

    I think this would have been amazing with raspberries but 1) they're expensive when not on sale and 2) I already had frozen blueberries on hand.  So we went with blueberries which was still delicious.  Next time, I think I would mix the blueberries into the batter so they were spread more evenly throughout the cake (I don't think I would recommend this with raspberries because they are much more delicate). 

    I also didn't have a 10-inch springform pan so after a quick search on the internet, a bundt pan holds approximately the same amount.  This worked fine for us although it probably caused the crumble topping to sink into the cake (and so it wasn't crumbly in the end).  It was fine because it still infused a delicious buttery lemon taste in each slice. 

    This does make a large cake so it fed us breakfast/snack/dessert for days.  But trust me, we weren't complaining!  I especially liked this coffee cake warm (a quick trip to the microwave did the trick). 

    Raspberry (or Blueberry) Coffee Cake
    Taken from:  Annie's Eats
    Serves about 12

    For the crumb topping:
    • ½ cup all-purpose flour
    • 1/3 cup sugar
    • Zest of ½ lemon
    • 4 tbsp. (2 oz.) unsalted butter, melted and cooled slightly
    For the cake:
    • 1 ¾ cups all-purpose flour
    • 1 scant cup sugar
    • 2 tsp. baking powder
    • ¼ tsp. baking soda
    • ¼ tsp. salt
    • 3 eggs
    • 1 cup sour cream (I used 1/2 cup 2% plain yogurt and 1/2 cup light sour cream)
    • 1 tsp. vanilla extract
    • 1 tablespoon lemon juice
    • 2 cups fresh raspberries or blueberries
    1. Preheat the oven to 350˚ F.  Lightly grease and flour and 10-inch springform pan (if you don't have a 10-inch springform, I used a bundt pan instead).  To make the crumb topping, combine the flour, granulated sugar and lemon zest in a small bowl and whisk to blend. Add the melted butter and stir with a fork until the mixture is crumbly. Set aside.
    2. To make the cake, combine the flour, sugar, baking powder, baking soda and salt in a large bowl.  In another bowl, whisk together the eggs, sour cream and vanilla until well blended. Make a well in the center of the flour mixture and add the liquid ingredients.  Fold together gently until evenly mixed and no streaks remain, being careful not to over mix.  Spread the batter into the prepared pan in an even layer.  Dot the top of the batter with the raspberries. Sprinkle the crumb topping evenly over the berries.
    3. Bake until the topping is golden brown and a toothpick inserted into the center of the cake comes out clean, 38-42 minutes.  Transfer the pan to a wire rack and let cool for 20 minutes.  Remove the sides of the springform pan.  Serve warm or at room temperature, cut into wedges.